
After you finish provisioning your **Livechat** channel asset on Webex Connect, you will need to register it with WxEngage to use it for your business’s contact center use case.
### Pre-requisites:
WxEngage will require a **Connect service** to deliver outbound messages from your contact center - so kindly make sure that you have created a service for registering this **Livechat** asset with Engage. You can find details about how to create a WxConnect service here. Follow the steps below to register your Livechat asset with WxEngage:
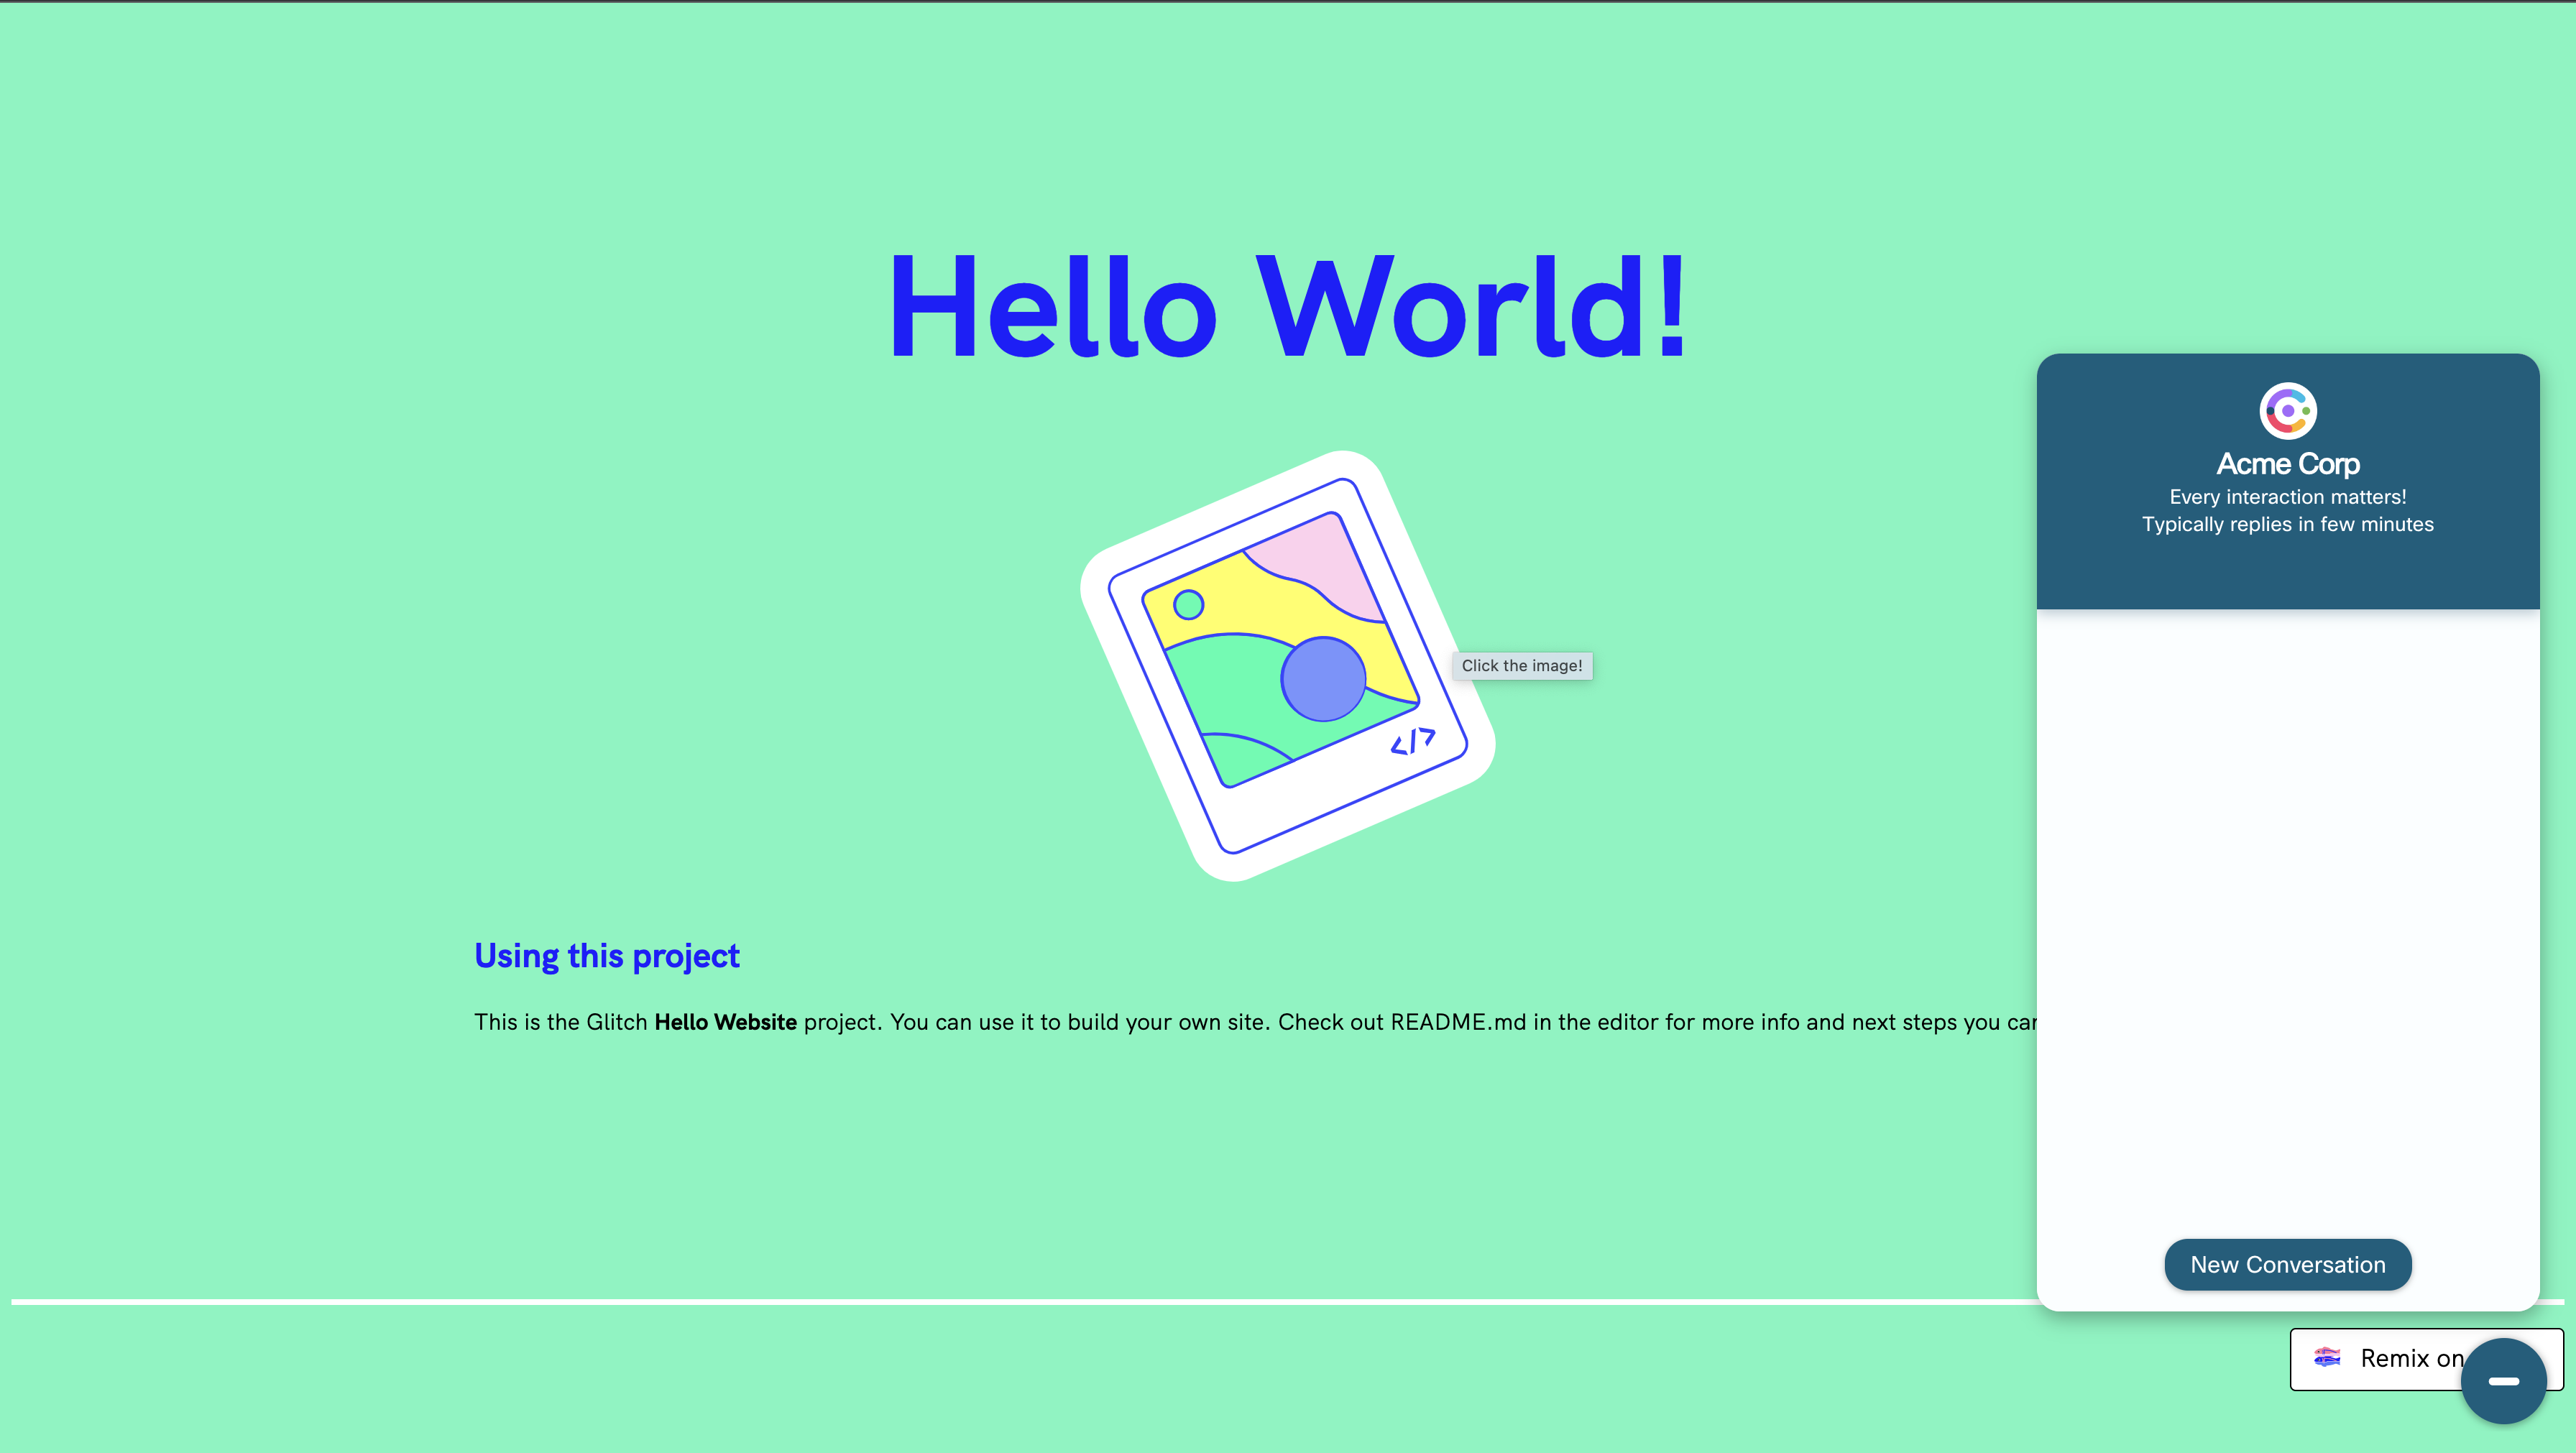
At the end of this provisioning step, WxEngage will provide you with an installation script that needs to be embedded into your website’s code. Also, Engage will expect you to whitelist your website’s domain in the Admin console. In case you don’t have a website yet or would like to try this out on a test page, we recommend using [glitch.com](🔗) to try out the Livechat widget (any more explanation needed?)
**Steps:**
Head to Assets > **Apps**
Click on the ‘**Manage**' button of the Livechat asset channel asset you’d like to register
Click on the **‘Register to Webex Engage’** button on the top right
Choose the service that you created in the pre-requisite step and click on the ‘**Register**’ button.

Once you see the success toast message on WxConnect, you can now log in to your WxEngage tenant to confirm that your Livechat asset has been synced and continue further contact center configs there.
As shown above, you will see a **Webex Contact Center icon** and a PCI check enabled flag next to the Live Chat asset once it's been successfully mapped with **Webex Engage**.
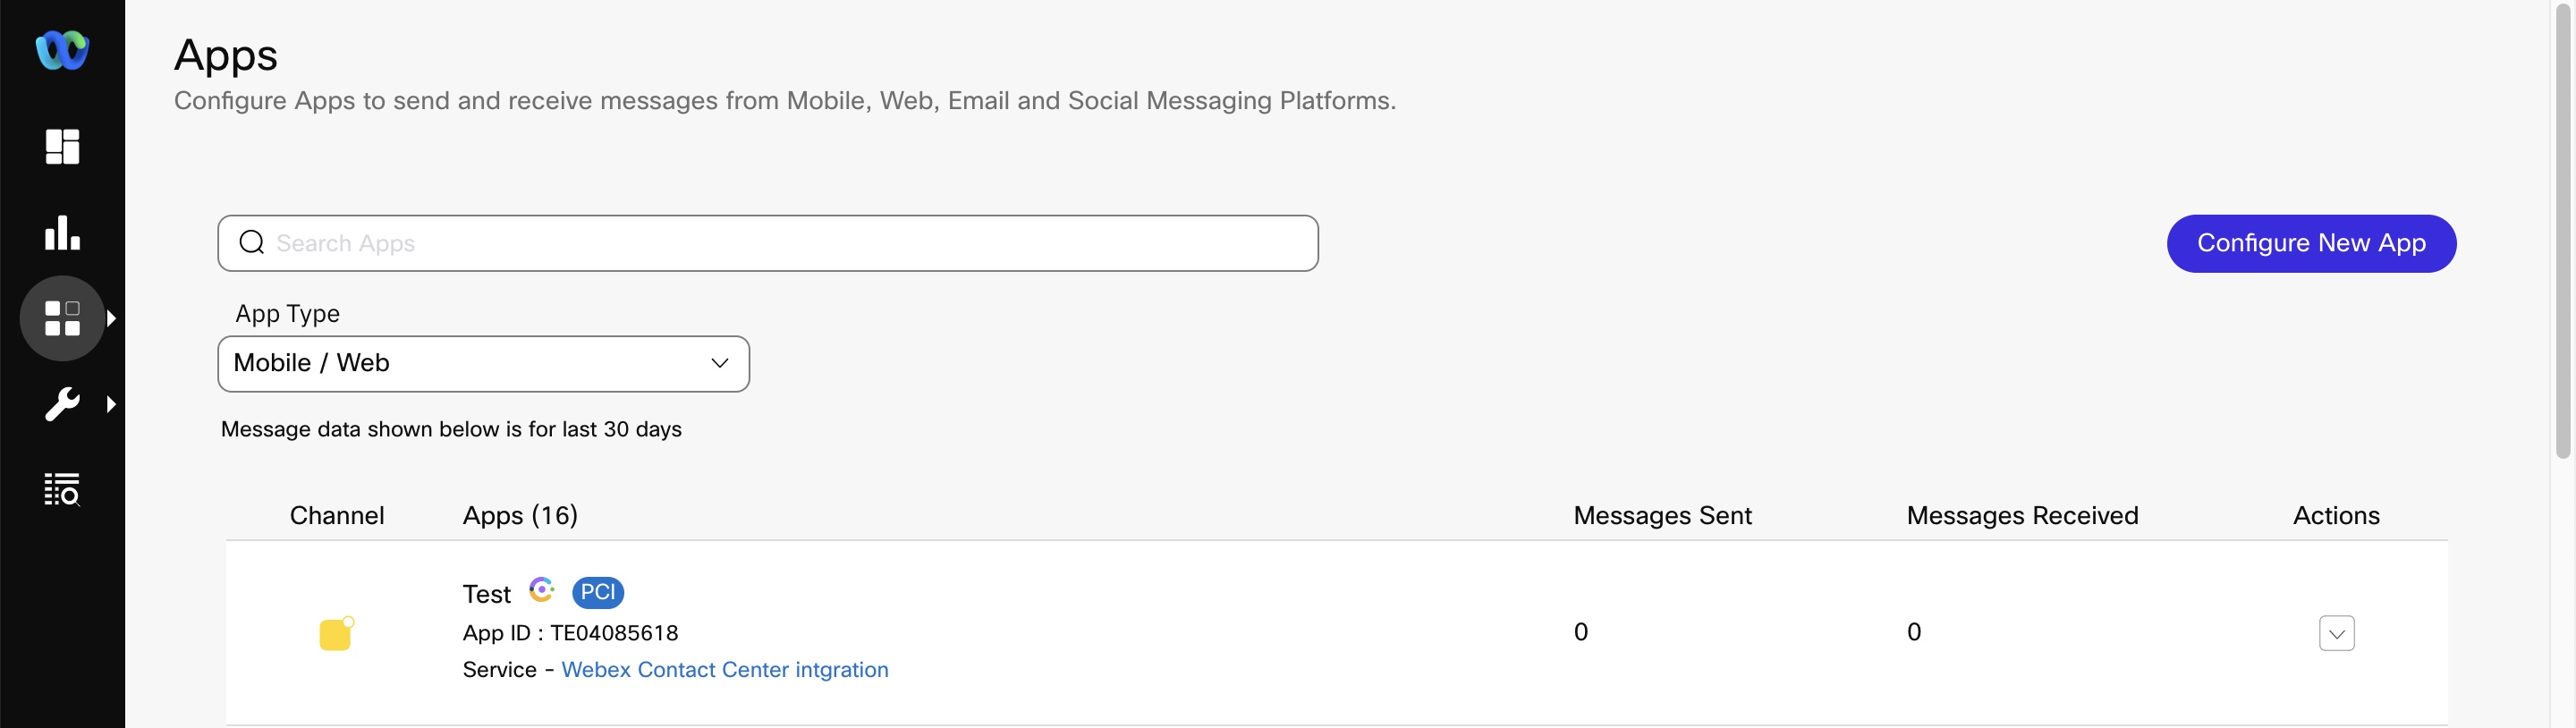
By default, your channel asset will be mapped to the ‘Default Team' on WxEngage. If you’d like to modify this or share this asset this multiple teams to enable transfers amongst teams/allow agent-initiated outbound comms from various teams, you can manage these configs from your Engage tenant’s _Admin console > Assets > Channel assets > Livechat (Tab)_ and clicking on the ‘**Edit**’ icon. More details on how to manage your assets on Engage and deploying the Livechat widget can be found [**here**](🔗)
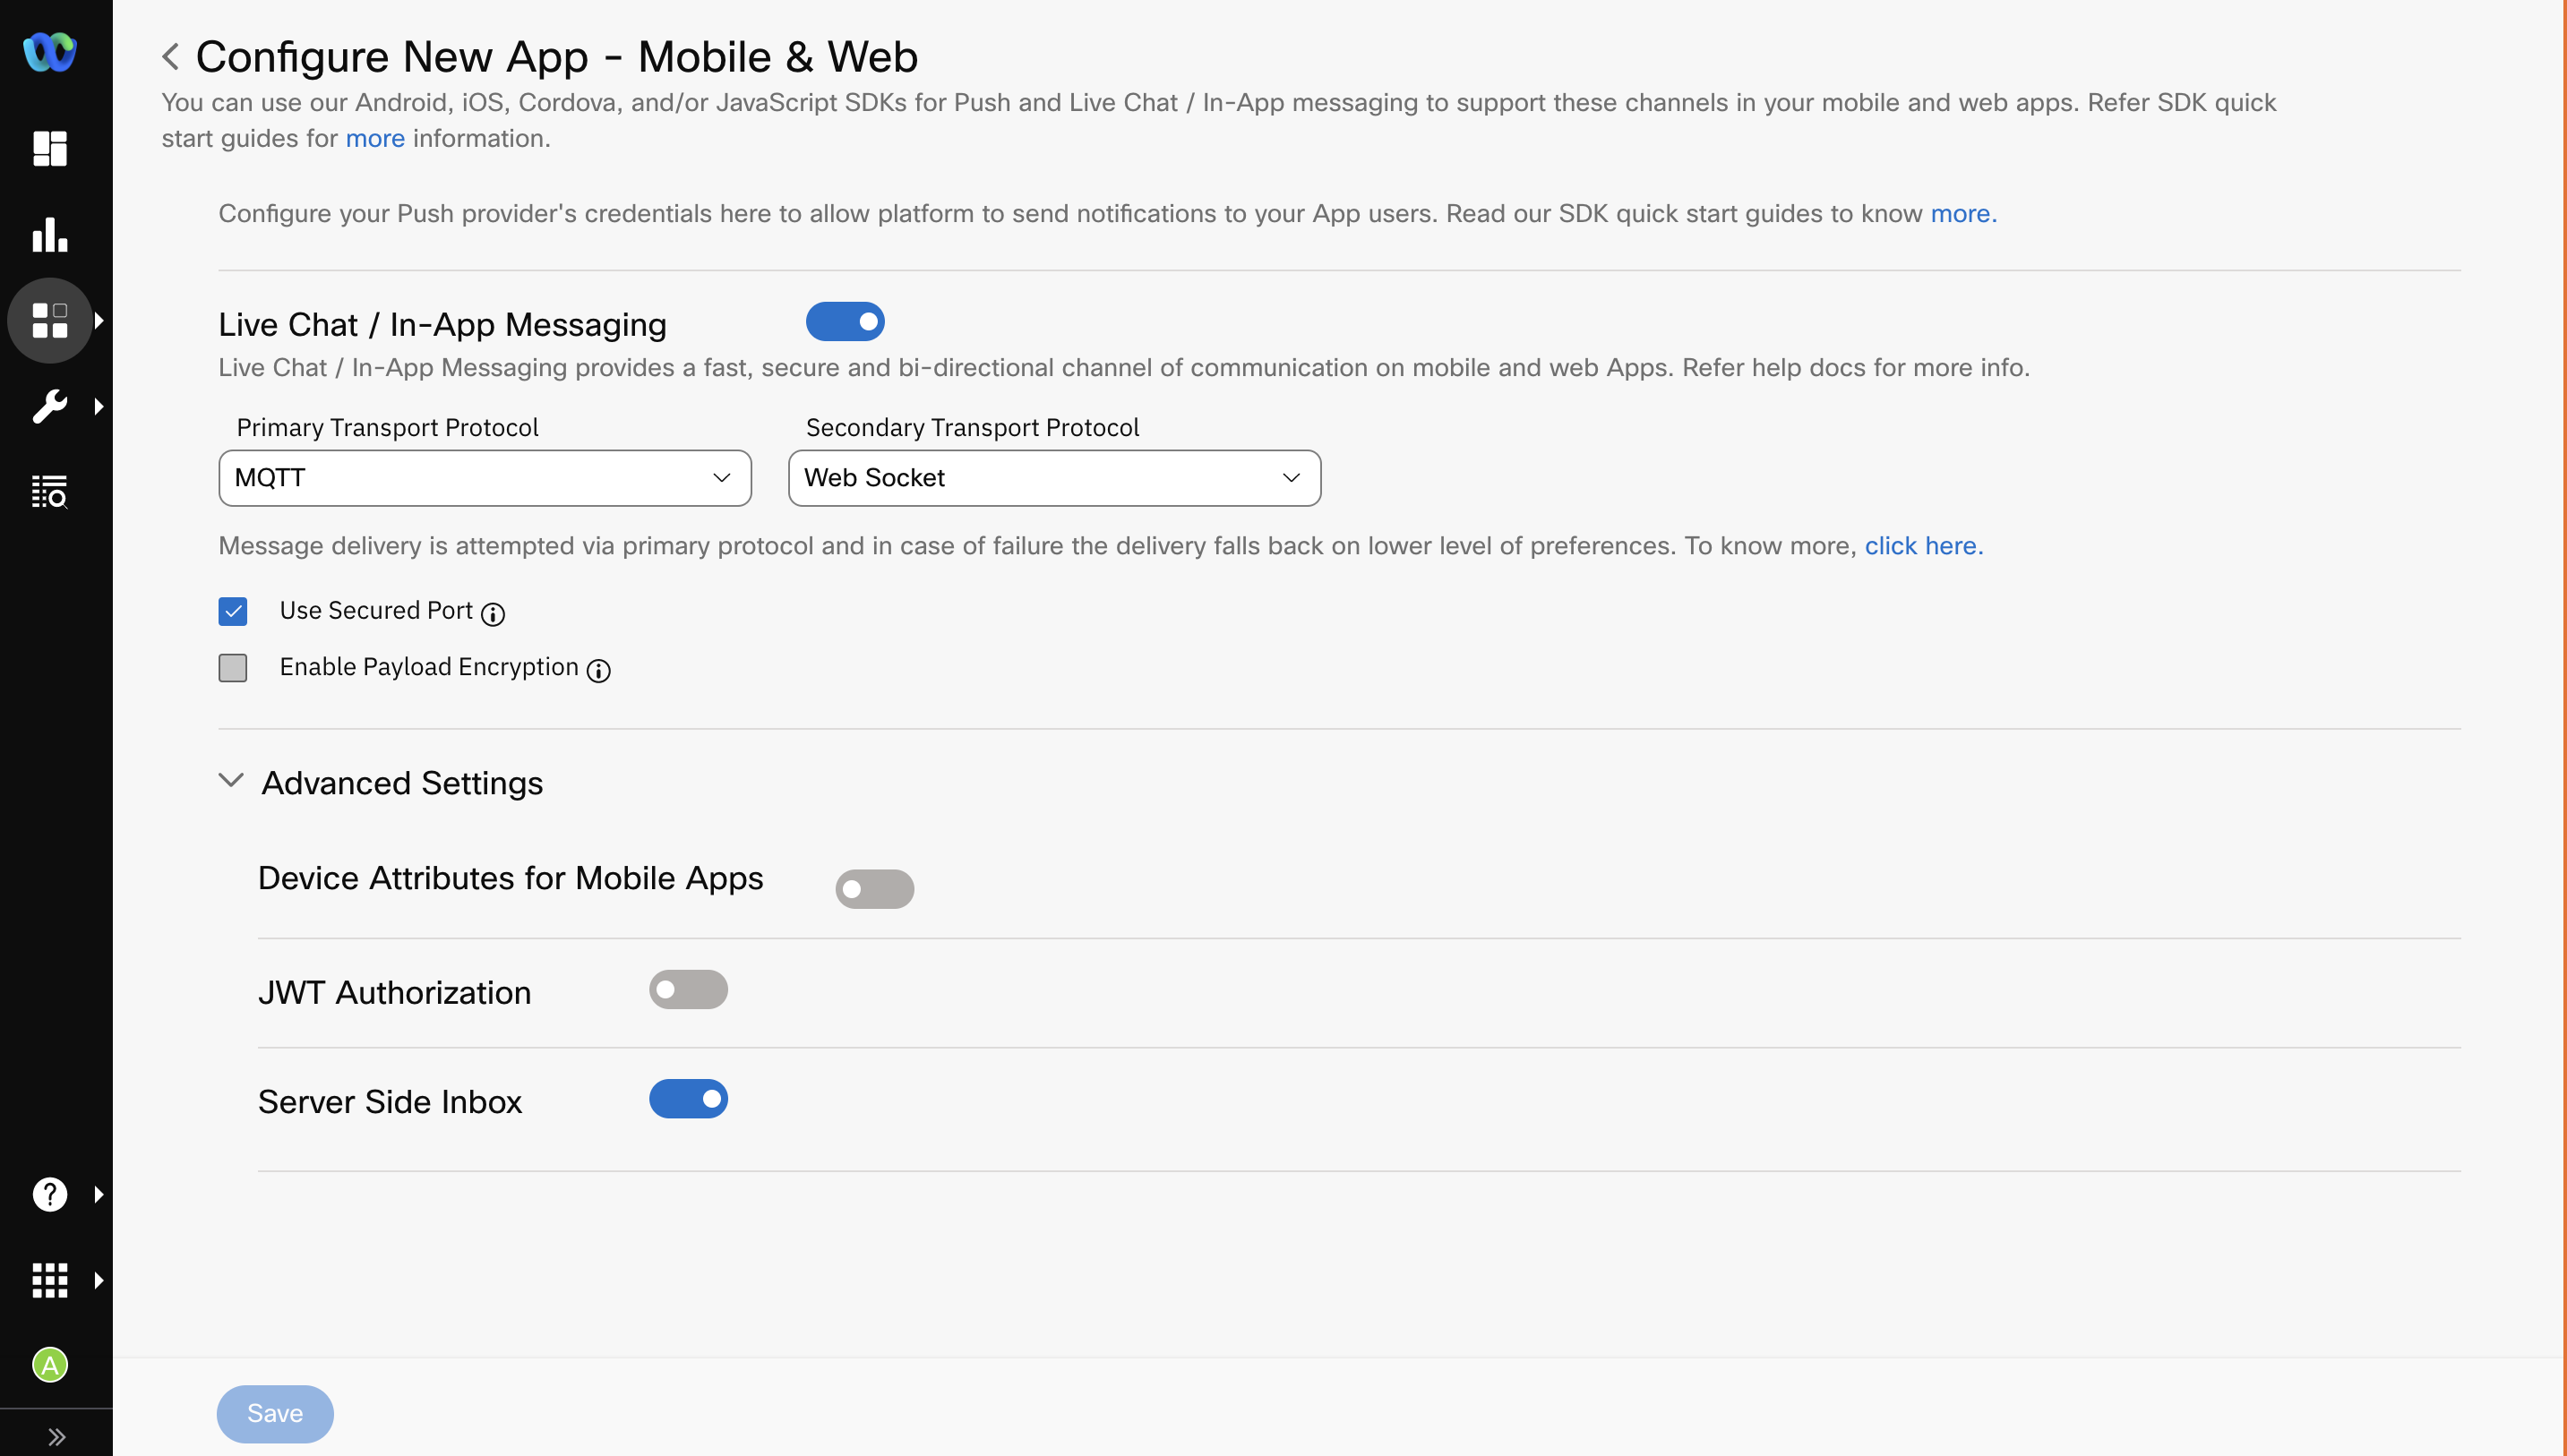
## Configure Livechat widget
In addition to the above, you will also need to whitelist your website’s domain on WxEngage. To do this follow the steps below:
Log in to **Webex Engage** as an Administrator
Go to **Assets > Channel assets > Livechat (Tab)** and click on the **Edit** icon of the asset you just created
Go to the **Websites** tab
Click on ‘**Add website**’ on the top right. Fill in the mandatory fields as necessary
In the **General settings** tab, make sure you configure your **website’s domain** without http (or) _https\://_ prefixes e.g. _\*.acme.com_
Configure the ‘**First message**' that you’d like your end customers to see on the Livechat widget. You will also need to use this subsequently when you configure your Connect flow to route messages.
Click on **Save changes**
You can refer to the [‘Livechat website configuration guide](🔗)’ to further customize the widget’s behavior on your website.
### Deploying the widget on your website
Log in to **Webex Engage** as the Administrator
Go to **Assets > Channel assets > Livechat (Tab)** and click on the **Edit** icon of the asset you just created
Go to the **Installation** tab
Click on the '**Copy**' button
Paste the code snippet before the closing _</body>_ tag in your website's HTML page and deploy
Voila! You should now see the Livechat widget appear on your website. Click on the '**Launcher**' icon on the bottom right to expand the Livechat widget.
Warning
You cannot change the service mapping once done. Hence, the asset registration on Webex Engage should be done after the service to be used has been decided.
Do not delete a Livechat asset once it's been registered with Webex Engage. Once deleted it cannot be restored. Doing so would lead to asset deletion within Webex Connect alone while the entry continues to be in Webex Engage